Sunday, July 31, 2011

Asp.Net MVC3 and Asp.Net Web Forms Side-By-Side in One Project.

You must have known from my previous post that, we have moved to MVC3 instead of the Web Forms approach.

While I was suggesting the clients to adopt the new MVC3 framework, the obvious question from their side was, Can the Web Forms and MVC3 co-exist?  Can the new MVC code reside in the Web Forms project?

I Googled a little, found that it was very much possible, however we needed to spike it out to be completely sure.  After some trial and errors, we were able to make the Web Forms and MVC3 code co-exist in one project.  The entire process was not very straight forward hence, I decided to write a post on how to do it.

Let's first create a bare bone ASP.NET Web Forms application.  This can be done by using the Create New Project Wizard of the Visual Studio 2010

Create new Asp.Net Web Forms Project

The Wizard generates the web.config file, master page and two pages About.aspx and Default.aspx.  Running the app at this stage should open up a page like this
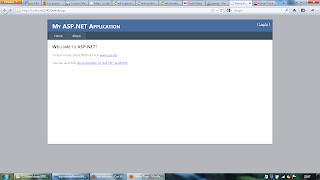
Asp.Net Web Forms Default Page

Now we have an asp.net web forms application up and running.  Lets try and add the MVC3 code in the existing project and lets get it running.  This would effectively prove that Web Forms and MVC3 can co-exist.

Integrating MVC3 into the Web Forms application - How Do They Do It!

MVC3 is build on Convention Over Configuration.  Controllers in MVC3 are put in a special directory called Controllers, the views go into the Views directory.  Lets create these two directories at the root level.

Adding Directories Controllers and View

Let's add a very simple controller class called HomeController to the project.  All MVC3 Controllers need to extend the System.Web.Mvc.Controller class.  To do this, you will need to add the reference of the System.Web.Mvc.dll into the project.

Lets look at the code that goes into the HomeController

The HomeController has a very simple Index Action method.  This Index action is simply going to render the Index view.  The Action method also adds a property to the ViewBag called UserName.  We will use the UserName Property in the view.

The Index view needs to be created.  Let's create a file called Index.aspx in the Views/Home/ directory.  The Index.aspx file looks like

Notice that, the aspx page inherits the class System.Web.Mvc.ViewPage and not System.Web.Page. All MVC3 views must extend the ViewPage class.

Also Notice, how we are showing the UserName from the ViewBag using the <%= %> Syntax.  Unlike traditional ASPX pages there is no code behind for this ASPX file.  

Curious thing about Index.aspx file is that, it does not inherit from the HomeController class.  Then how can the view access the ViewBag property UserName which was set in the Controller? 

Well, the MVC3 framework implements Separation of Concerns between the View and the Controller.  But it surely needs to pass information between the Controller and View, ViewBag is just one way of doing this.  Whatever we set in the ViewBag from the Controller is available in the Views!  This is just one of the way in which you can pass information between Controller and View.

The project structure at this stage looks like

Project Structure after adding the HomeController and Index.aspx page

At this stage, if we could open up the URL http://<host name>:<port>/<your application name>/home/index then we can be sure that we have successfully integrated MVC3 in a Web Forms Project.  Lets try and browse the URL and see what we get.

404 Error When we try to browse /home/index URL

We get a The resource cannot be found (404) error.  

Why?  

This is because, we have not yet informed the framework that, when someone hits the URL /home/index then how should it be served.  This can be done by registering a new route in the Global.ascx.cs file.

This file has an Application_Start method.  This method is called when the application is started.  In this method we have to inform the framework that, when someone sends a request for the URL /home/index then, route that URL to the HomeController.  This is done using the following code

The complete code of Global.ascx.cs file looks like

Lets run the application and browse the URL /home/index lets see what happens now?

Parser Error - Could not load type 'System.Web.ViewPage'
Nope, not there yet.

Turns out that for the page to get compiled and render correctly we need to add the System.Web.Mvc in the system.web/compilation/assemblies section in the web.config. The updated web.config looks like 

The only change here was to add the assembly System.Web.Mvc to the list of assemblies under the compilation section. This will make sure that this assembly is available to the aspx view when its compiled.

After making this change lets run the app and browse the URL /home/index and lets see what happens.

Index.aspx is rendered Successfully using MVC3

Success!  We are able to render the page using MVC3 in a Web Forms application!

Notice that, currently we are using the aspx rendering engine for rending MVC3 views, in the next post I will explain how we could take advantage of the new Razor Rendering Engine in a Web Forms application.

Sunday, July 24, 2011

Showing an Image Gallery for HTML5 Mobile Web Site

Last Friday, I got task that was to be done as quickly as possible.

What Was the Task?

There was a HTML5 based mobile web site that few people from my company were working on.  On a certain page, we were showing thumbnail images

Page with Thumbnail images on it

If user wants to see a bigger image, they can click on one of the thumbnail images, a new page opens up which shows only the image that user had clicked.

New page is opened,
it shows only the image that was clicked
 If user wants to see the next image, they have click back button on the browser and then click the other image in the thumbnail list.  Certainly this was not very user friend behavior.  There was no easy way to see all the images one after the other.  User had to navigate between the pages to see all the images.

Hence, I was given the task to implement some sort of a image gallery which will enable users to navigate between the images easily.

The Approach

Initially, I thought that the task was simple.  The possible approaches that immediately came to my mind where
  • Full Home Grown Solution - This meant, writing some JavaScript on my own to show Next and Previous links (on the page where we are showing the image) and then cycle through the thumbnail images.
  • Reuse an existing image gallery JavaScript library - This meant, Googling a little, finding what image gallery JavaScript libraries are available and using the one that fits the our requirements.
I am firm believer that, one should not reinvent the wheel!  Hence, for obvious reasons, I ruled out the first approach.  I narrowed down my task, to find the Image Gallery JavaScript that would suite our requirements.

Lets look at the HTML used to show the thumbnails and then the bigger images.

As you can see, the HTML used to show the thumbnails and full images is pretty standard.  Thumbnail images are wrapped with an Anchor (<a>) tag with href attribute pointing to the full image.  Because of this, when user's click on the thumbnail, a new page with full image URL opens up.

I was in no mood to change the HTML or use completely different approach to show the Image Gallery.  I wanted to do as little as possible to get the desired results, I am a lazy developer you see!

We were using jquery on our HTML5 Mobile Website.  I was thinking, there should be a ready made jquery plugin, which would show the images one after the other and I would have to do little or no work.  Googling a little, I found many JQuery based Image Gallery JavaScript that looked promising.  I will list down a few of my not so successful attempts at showing the Image Gallery and then finally the one worked for me.

The JQuery LightBox Plugin

I am a fan of this plugin.  I had used this plugin in the past for few of my other projects.  I like everything about this plugin, the ease of use, the end result etc, its completely awesome!  Hence, I decided to give this plugin a go.

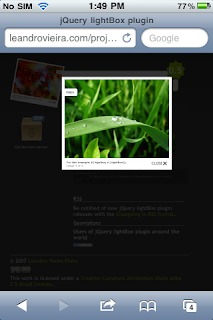
I opened up the JQuery LightBox examples URL on an iPhone to see how it behaves on the phone.  This is what I get
LightBox examples URL opened in iPhone 3Gs
There is no doubt that it works on the iPhone.  But somethings were not right.
  • The preview image is still very small 
  • Next, Previous and Close links are difficult to find and click
  • One needs to Zoom In on the page to actually see the bigger preview image or click next, previous links.
  • Does not support swipe to change the image.
  • Clicking the Browser Back button takes the users to the Previous page in the browser history, it should have closed the full image preview dialog and stayed on the same page.
I realized that I was trying to fit one solution to all problems.  Its evident that although the JQuery LightBox does an awesome job at showing the Image Gallery for web based application, I needed a JavaScript library that was build/optimized for Mobile devices.  

Please note that, the issues that I just mentioned are not JQuery LightBox specific issuesThere is no doubt that the authors of JQuery LightBox have done a fantastic job at developing an Image Gallery JavaScript library, that does an awesome job at showing Image Gallery on web pages build for Computer and not for mobile devices.

I decided to search for Image Gallery JavaScript libraries that were build for the Mobile devices.

Touch Gallery

Finally, I found a JQuery based Image Gallery JavaScript library that was build for mobile devices.  The Usage was simple enough, all I had to do was
  • Add the <meta> tag for the viewport
  • Include the TouchGallery javascript library
  • Select the appropriate Anchor (<a>) elements and call touchGallery JavaScript function on them.
Updated HTML looks like

JavaScript to integrate the Touch Gallery looks like

So far so good, lets look at the rendered result
Preview image opens up in full screen
using Touch Gallery
Better? Yes, the result is definitely better then the JQuery LightBox plugin.  Lets look at things that I like and dislike about this plugin.

The Good
  • The preview image is bigger and occupies full screen width
  • User can change images using a swipe
The Bad
  • There are no buttons to go Back and Forward.  User might not know in the first go that, they could swipe to change the image.
  • Big black sections at the top and bottom of the preview image
  • There is no close link, which users can click to go back to the page which shows all the thumbnails
  • Clicking the Browser Back button, takes the users to the Previous page in the browser history, it should have closed the full image preview dialog and stayed on the same page.
Seems like we were able to solve a few problems but still there are a few negatives.

Now what?  Write a custom solution?  NO! Never do that!  Obviously people must have faced this problem before and there has to be a JQuery based JavaScript library that fits my requirements, after all, its not Rocket Science!

I decided to find a better solution!

PhotoSwipe

PhotoSwipe is a FREE HTML/CSS/JavaScript based image gallery specifically targeting mobile devices.  It provides visitors with a familiar and intuitive interface allowing them to interact with images on your mobile website.  So far it seems to fit the bill.  Lets integrate it and see the results.

Integrating it was not all that difficult, all I had to do was
  • Add the <meta> tag for the viewport
  • Add the PhotoSwipe and dependent JavaScript files.
  • Add the PhotoSwipe css
  • Select the appropriate Anchor (<a>) elements and call photoSwipe on them.
Update HTML looks like

The Script to integrate the PhotoSwipe JavaScript library looks like

Looks simple right, lets look at the results
PhotoSwipe in action
Portrait mode with navigation links
PhotoSwipe in action
Ladscape mode with navigation links
As you can see, the results are wonderful.

The Good
  • The preview image is bigger and occupies full screen width
  • User can change images using a swipe
  • There are navigation links using which users can go back, forward, close the dialog and even play the images as slide show
  • Clicking the back button of the browser show the original page with thumbnails on it!
PhotoSwipe fits the bill completely!

IMHO there is no one solution that fits in all situations, but certainly there is a solution out there in the wild, that will fit your requirements!  If you don't find it in the fist go, try harder!

Sunday, July 17, 2011

Asp.Net MVC vs Asp.Net Web Forms

We were working on this project which was build using C#, .Net 4.0 and Asp.NET Web Forms.

I come from a Java background where MVC pattern has been around since ever.  There are tons of Java based web frameworks out there that implement the MVC pattern.  It looked quite surprising to me that, till very recently there was no equivalent of MVC pattern in the .Net world.  But, recently the things have changed, Microsoft has come up with its own implementation of the MVC pattern called Asp.NET MVC3.

I certainly like the MVC approach over the Web Forms approach for multiple reasons, I had to present these reasons to the client and convince them to move to Asp.Net MVC3 instead of the current Asp.Net Web Forms approach.  Finally, after quite some talking and presenting and discussions we managed to convenience the client to adaopt the Asp.Net MVC 3 approach over the Web Forms approach.

This blog post highlights the points why I think, MVC makes a better choice as the presentation framework over Web Forms.

Separation of Concerns (SoC) And Single Responsibility Principle

If you ask me, what are the two most important principles which helps in keeping the code clean, modular, readable and maintainable?

My Answer would be, Separation of Concerns (SoC) and Single Responsibility Principle. 

Its extremely important that every class in the system has a well defined job for itself.  No class should try and do too many things, in fact it should do only *one* thing and do it well (Single Responsibility Principle).  If one class tries to do too many things, then the code of the class would be messy, difficult to understand and maintain.

The code behind classes of the Web Forms approach are victim of this problem.  Lot of times, I have seen the code behind classes are bloated and are longer than 2000 lines.  Such classes are difficult to maintain and understand.  The code looks convoluted.

Why does this happen?  

Because, code behind classes have lots of responsibility.  They deal with
  • Showing the view
  • Dynamically rendering JavaScript
  • Updating the model
  • Validating the values entered by the user
  • Implementing some business logic
  • Making a call to the service
  • Differentiate the Post and Get requests etc.  
End result is a truly complex and gumped up code behind.
MVC on the other hand, implements these principle very well.
  • Controller classes are only responsible to update the model, decided which view to render and that's about it.
  • Views only responsibility is to use the model to render itself.  
  • Model just holds the business realted information.  
End result of all this is clean, modular, readable and maintainable code.

MVC gives full control over the rendered HTML

In the Web Forms approach, we were using third part controls called Telerik controlsAt times its really difficult to control the HTML that gets rendered from these controls.  Many times the HTML that is rendered is more complex than what would be required.  Because of this, designers find it difficult to style it the way they want it.

With MVC, you get full control of the exact HTML that gets rendered.  This is an absolute boon for the designers and developers

Unit Testing

I don't want to talk about how difficult it is to unit-test web forms code behind classes.  The web form code behind classes are tightly coupled with things like Session, ViewState Request, Response etc.  This makes them extremely bad candidates for unit testing.  To unit test web forms code behind classes one needs a very strong will and extremely good mocking and Unit testing skills.

On the other hand, MVC has been build with Unit Testing in mind.  One can easily do Test Driven Development with MVC controllers.  Controllers are not coupled with Session or Request or Response object which makes them easily unit testable.

Search Engine Optimizations and RESTful URL's

Web Forms application URL's end with .aspx extension.  They represent a physical file in the file system.  The MVC URL's do not have any extensions.  They do not logically map to a file on the file system.  Instead they map to a controller and an action method inside the controller.  The URL of MVC application look like
  • http://localhost:8080/appname/customer/create
  • http://localhost:8080/appname/customer/1
  • http://localhost:8080/appname/customer/list
  • http://localhost:8080/appname/customer/edit
Integration with Third Party JavaScript libraries

Its difficult to integrate the web forms application seamlessly with a JavaScript library.  For e.g. If you wanted to do Ajax with jQuery in a web forms application, imagine how much code you will have to write.  How will you render the dynamic HTML in this case.  How will you preserve the view state?  Its all very messy.

With MVC, we do not have a problem like this ever.  By default, MVC application comes integrated with jQuery.  However, you could go ahead and integrate any other JavaScript library of your choice.  Since view is not tightly coupled with controller integrating any JavaScript library is extremely easy.

No IsPostBack

I think there is no Asp.Net application in the world that does not have code which looks like

One class/method to handle both the get and post requests. At every step we have to decide whether its a get request or a post request and change the business processing.

This is infrastructure code. We should not be bothering about checking whether the request is a get request or a post request. Framework should do this for me.

With MVC, we do not have to keep checking whether its a get request or a post request.  We can simply put an attribute to a method marking it only accessible via the GET request or only accessible via the POST requests.  With MVC the above code would look like

Notice that we simply have to mark which methods are invokable over which protocol using either the HttpGet or HttpPost attributes. End result, simplified and easy to understand code.

No View State 

Web Forms provides a wrapper over the stateless HTTP protocol to make it state-full.  It achieves this by adding a hidden field called __VIEWSTATE__ to the rendered page.  If not handled correctly and especially when you are using some third party control library like Telerik controls ViewState can easily get out of hands.  I have see pages that have ViewState that goes in MB's.  This ViewState will be sent/received to/from the server for every Post requests.  Its sent/received to/from the server even when you do a Ajax request.  The performance of such pages goes for a toss!

MVC has no concept of ViewState.  MVC does not add a wrapper over the stateless HTTP Protocol.  In fact it harnesses the HTTP protocol.  Hence, MVC pages are much faster and they can easily out perform the Web Forms counter parts on any day. 


These are some of the points why I think, MVC is definitely a better choice over Web Forms for building Customer Facing, fast Web 2.0 applications.  

This list is by not means an extensive comparision of Web Forms vs the MVC appraoches.  Just some little peaces which I though were really important.

We have made our choice to move to MVC, have you?

Saturday, July 9, 2011

Lohagad - Nature at its best - Rejuvenate yourself

It all started with me and my friend Mahendra, talking about how the weather in Pune is perfect for a trek.  We have been talking about doing a trek since one year now, but because of some or the other reason, never managed to actually do it.  But this time, I really really wanted to do it!  After some initially talks, we decided to do a trek to Lohagad

I asked around to see if others were interested.  Total 12 people agreed for the trek.  We decided to start at 0630 hrs on Saturday and come back by afternoon.

Staring from 2000 hrs on Friday evening, I started getting SMS'es from people saying they cannot make it.  By morning, I was thinking it will be just me and my wife who will be going for the trek :).  But in the end, we were 5 adults and 4 kids (all of them 8 years old) made it!

As planned we started off at about 0630 hrs.  I had been to Lohagad in the past, at that time, there were no shops at the top, i.e. no food and no water at the top.  Hence, we wanted to have heavy breakfast before starting.  We tried a few good restaurants but none of them were open that early.  Finally, we settled for a dhaba type place to have breakfast.  Although the ambiance of the place was not all that great, the food was good!  We had Misal, Poha and Tea.  After filling our tanks, it was time to hit the road again. 

We reach the base village Malawali at about 0830 hrs, it was a good surprice to see a very well organized pay and park facility at Malawli.  We parked our vehciles there and started the climb.


The Way Up:

Right at the beginning of our ascent we saw two waterfalls.

As we climbed up, breathtaking views would unfold in front of our eyes.  The natural beauty on the way was simply amazing.

A few images to illustrate what I mean


At one point right over our head we saw a big rock which looked like a gigantic ship.  It would immediately remind you of the famous scene from "Titanic" where Leonardo and Kate are standing at the tip of the titanic to feeling the breeze.
The snaps does not do justice to the view that we saw!

For the first time in my life I saw blue beetles
After walking some more, we saw another natural miracle.  We saw a big rock hanging by the side of the cliff.  The rock and cliff would be attached only at the ends.  The space between the center of the rock and the cliff formed a shape which looked similar to Shiva's third eye!  Its difficult to explain, a picture would clarify things.
Finally, after about 1.5 hours of walking and enjoying the natural marvels, we reached the base of the Fort.  There we were greeted by our ancestors
There are lots of monkeys in and around the Lohagad fort.  They were waiting to get one opportunity to snatch anything that looked like food. 

There are proper steps created to go from the base of the fort to the fort itself. 

During the monsoons, small stream of water keeps flowing down the steps.  On our way into the fort, we saw a small lake formed by the back waters of the Pawna dam.

On the way up, we saw ruins of few small cannons.  We tried to lift them just to see how heavy they were, but they wont move even a inch!
A few more steps and we saw a gigantic Maratha gate!  It had massive chains and sharp spikes all over it.  Needless to say that one person cannot open or close the gate.  The spikes made sure that, it would be difficult even for a fully grown elephant, to break open it.
Last few steps, took us into the fort.  No one wanted to walk any further without having a bite.  We decided to stop there and have something to eat.  We had carried lots to eat, Sandwiches, Chips, Sabzi Roti etc.  When we were half way through our lunch, one monkey located us and came extremely close to us, looking for an opportunity to snatch something.  We reacted quickly, we put everything back in the bags and started walking.  5 adults and 4 kids against 1 monkey, believe me, monkey was not at all afraid of any of us.  In fact he was actually trying to scare us.  We had to finally give him a peace of sandwich.

We decided to move ahead since we could not continue our lunch at the same place.  After walking for 5 min we saw a Dargah and a small pond, we decided to finish our lunch there.
After lunch, it was time to sit and relax and do nothing absolutely nothing!  Cool breeze was blowing continuously. 

I was at "peace" with myself! 

I was not thinking about anything, nothing absolutely nothing at all!  Not thinking about the city roads, traffic jams, home, projects to be delivered, meeting the deadlines, nothing! 

My 10 gallon head was completely empty.  Simply, sitting and enjoying the natural beauty.  I have to admit, I had not felt like this for quite some time now.  I am not a person who would keep thinking and worry about stuff, but still the feeling that I got at that point was beyond anything that I had experienced before.

In the movie The Pursuit of Happyness, right before he gets the job as a Broker, Chris Gardner says,

The next day, after work, we just went to the beach. Far away from anything, everything, just Christopher and me. Far away from buses, and noise, and my constant disappointment in my ten gallon head, in myself
At that moment, I was able to understand what he was talking about.  What is that feeling and I can tell you one thing, it surely feels great!  That moment for me was the best moment in the entire trek.  It was totally worth it!

After relaxing for about an hour or so, we decided to explore the, West side of Lohagad fort to see The Vinchukata(Scorpion Tail).

On the way to Vinchukata one has to climb down an almost straight wall made of rocks.
It was pretty steep, but in the end I did make it.  From the tip of the fort you could see the entire landscape.  There was no obstruction.  On one side you could see magnificent Sahyadri range and on the other side you could see the Pune-Mumbai express way.  Clouds were passing right through us.  Its was simply beautiful!

Later, at about 1400 hrs, we decided to start our descent.  While coming down one of our friend, twisted her ankle.  Luckily, it was not that bad.  After some rest she was able to walk normally.  We reached the base village at about 1545 hrs.

It was trek a wonderful trek with breathtaking views on the way and at the top.  But the most important USP for me were, those moments at the top when I was at peace with myself!


I would strongly recommend everyone to do treks on a regular basis.  Oh! almost forgot, all 4 kids did manage to do the entire trek by themselves.  No one had to carry them, in fact the kids carried their bags all by themselves!

If 8 year old kids can do the trek without any problems, so can you!  Go for it, I can assure you, you will return completely rejuvenated!

PS: To view all pictures visit this link
Have some Fun!